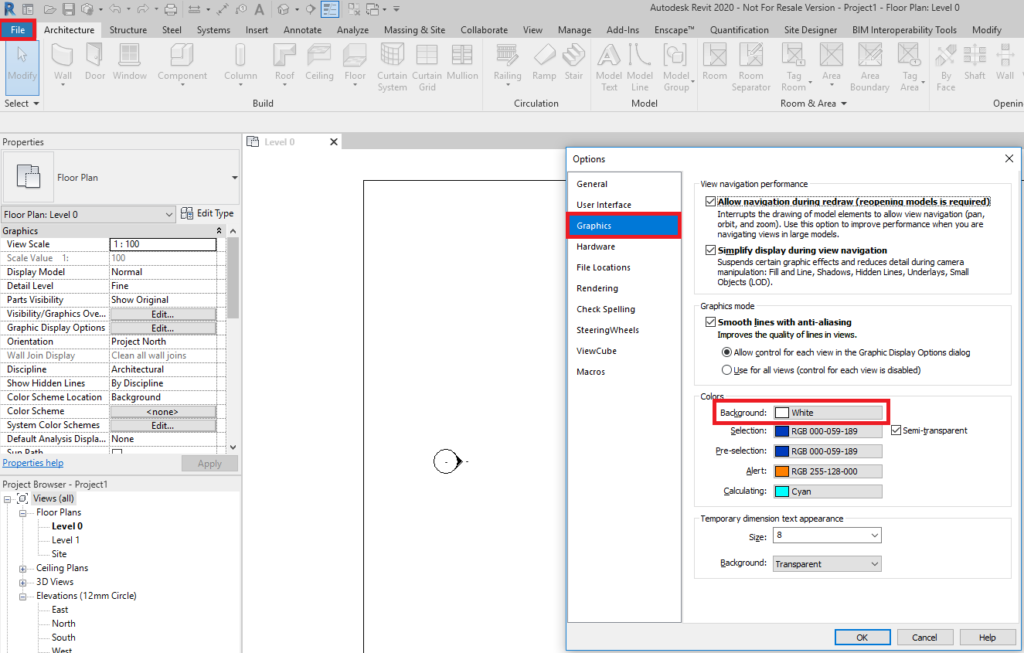
In Revit you can change the background colour from the default white to black or any other colour. This can sometimes be beneficial if you have come from another application such as AutoCAD where the default background colour is black.
Following the below steps I will show you how to change the background colour in Revit.
- Go to File in the top left.
- Click Options in the bottom right.
- In the Options window, in the menu on the left go to Graphics.
- In the section Colours, click on the colour next to Background.
- This will open a colour palette, choose your colour and click OK twice.

This will have now updated the default background colour within Revit.
Conclusion
Changing the background colour in Revit can be beneficial for a number of reasons but you can also change the defaults for other colours the same way such as Alerts, Selections and Calculations.
For more information on this blog post, or if you have any other questions/requirements, please complete the below form:
Related Links
Autodesk Revit – Man and Machine
Autodesk AEC Collection – Man and Machine
Autodesk Revit Training – Man and Machine
Autodesk Revit Demonstrations – Man and Machine
Autodesk Revit – Autodesk Platinum Partner – Man and Machine
Autodesk Revit LT – Autodesk Platinum Partner – Man and Machine
Autodesk Revit LT Suite – AutoCAD & Revit LT – Man and Machine
Revit Architecture Training – Platinum Partner – Man and Machine
Autodesk AEC Collection – Platinum Partners – Man and Machine


