Autodesk have released a new streamlined management portal to manage your team and licenses. In this blog, we’ll focus on assigning licenses, managing users and checking license details.
To begin, you’ll need to head over to the portal – https://manage.autodesk.com/home.
Please note, some sections will be administrative, only a Contract Manager (CM), Purchaser or Secondary Admin will be able to access these. If you need any help, please reach out to your administrator.
Users and Teams
Adding Users
All users accessing any Autodesk product will need their own Autodesk account, if they don’t have an account, please head over to https://accounts.autodesk.com/register first. Please ensure you verify and confirm the account once setup – you will receive an email.
Admins will have access to the User Management on the navigation pane. Within here, we can invite users to teams, manage roles and assign licenses.
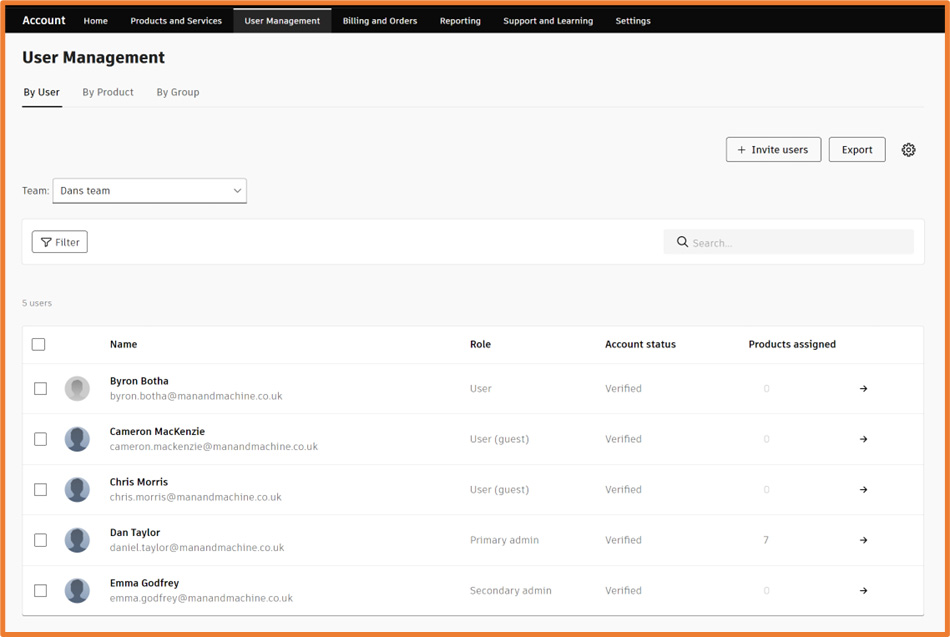
Let’s begin by inviting a new user to my team, elevating them to Secondary admin and assigning a license.
First, let’s select Invite Users in the top right corner. A dialog will appear, asking you to fill out their name along with email. If you need to invite many users, you can create a .CSV file to batch invite at once.
Once invited, the users account status will be shown as Invited, changing to Verified once they’ve activated their account.
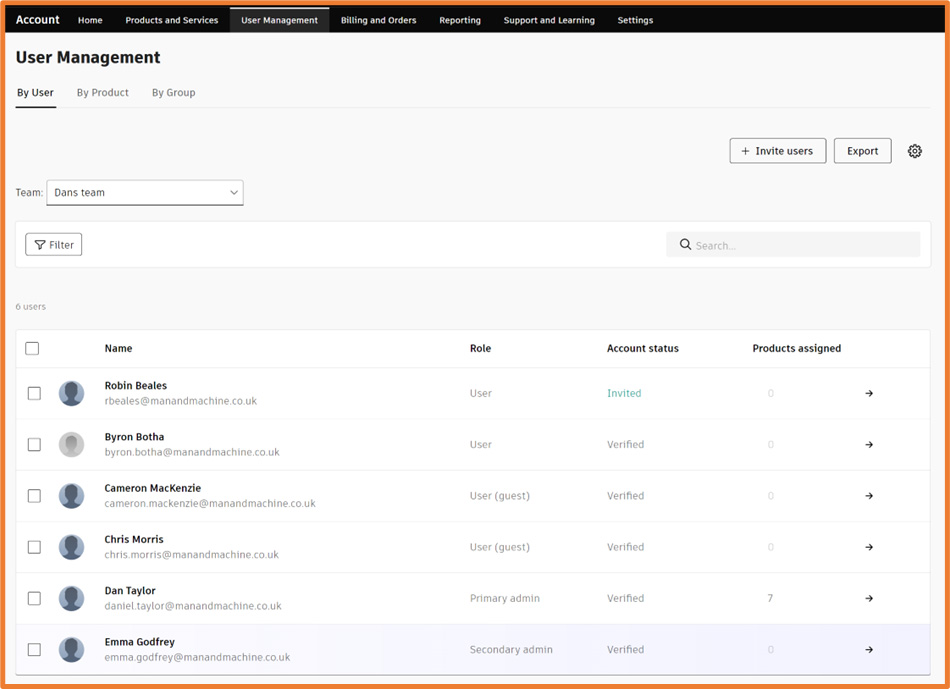
Secondary Admin
Let’s head into Robs profile. From here, we can elevate the user to a Secondary Admin. A secondary admin grants the user permission to manage other users and licenses within the team. You can have multiple secondary admins within a team, and grants the same privilege as the Primary admin. You can only have one Primary Admin, by default is the Contract Manager/Purchaser. We always recommend having at least one or more secondary admins, if the Primary admin is unavailable and a user needs access to products, another admin can complete this.
It’s important to understand, users can be an admin in one team, whilst a user in another. They will only have access to manage the licenses / other users in the team they are a secondary admin within.
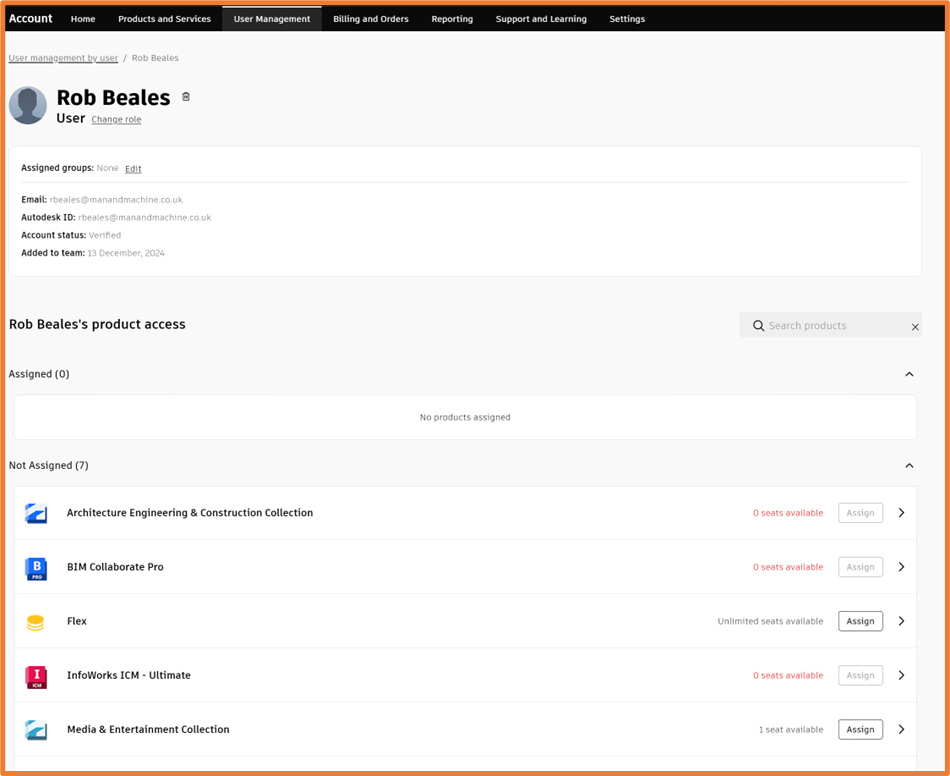
Lets select Change Role below Robs name. Another dialog will appear, select Secondary Admin and save.
Assigning Licenses
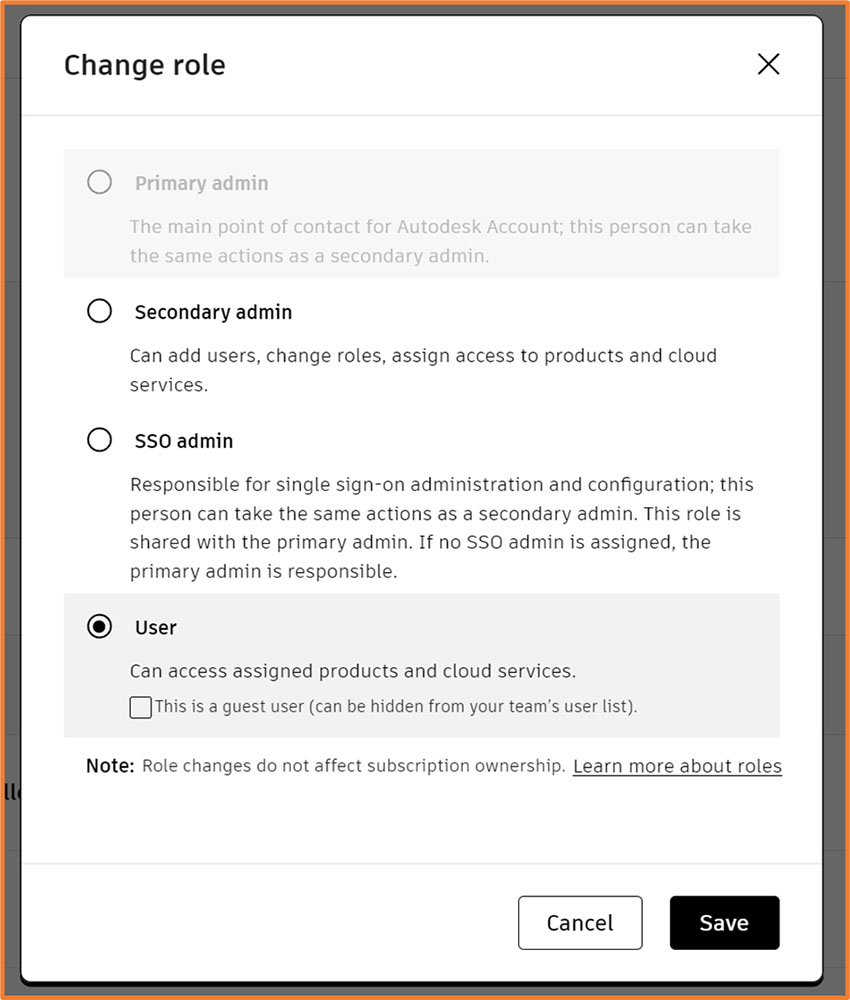
Now, let’s assign a license. There are three methods, all achieve the same outcome, however different workflows.
- By Product – allows to assign one specific product to multiple users.
- By User – allows to assign multiple products to a specific user.
- By Group – allows users to be pooled together, whilst assigning licenses to a group. Any user assigned to the group will automatically be given a license.
In this case, we’ll be using By User as we only want to assign products to Rob.
Let’s head back into Robs profile, you’ll notice there are no assigned products, alongside a list of all products below the assigned. Currently there is one M&E collection and Flex token available. Simply click Assign, and all products within the M&E collection will be available for Rob to use. You’ll notice once assigned, the product is now listed as Assigned and can be unassigned as/when needed.
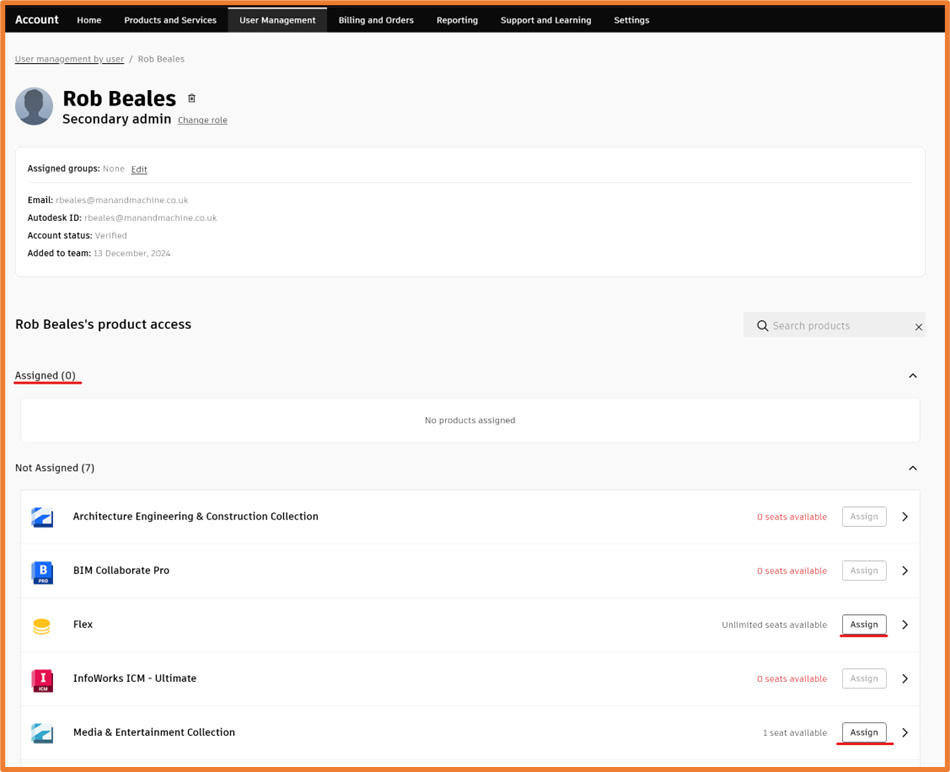
Flex tokens work slightly differently, there is no limit to the number of seats available. When assigning Flex tokens, we also want to be able to manage the products users will have access to (Flex grants access to all products, this setting can be changed to specific products if needed).
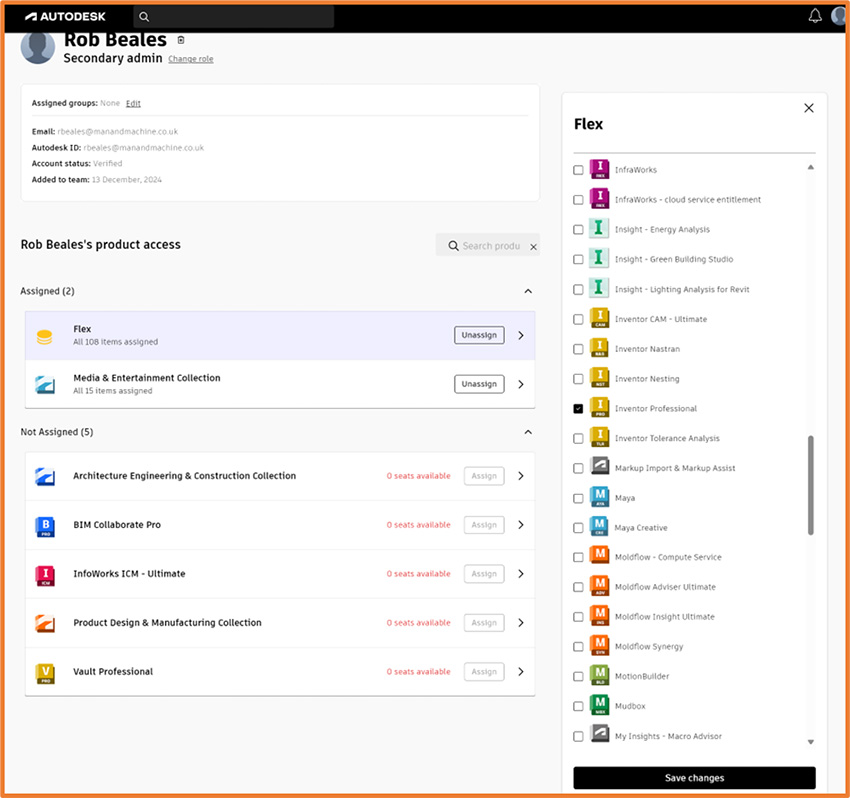
Selecting Flex, another dialog appears, indicating the active products. In this case, we only want Inventor available. Unselect all other products and hit save changes.
Going forward, Rob now has access to M&E along with Inventor.
Important to note: If a user is assigned both a license and flex of the same product, flex tokens will not be used.
Removing Users
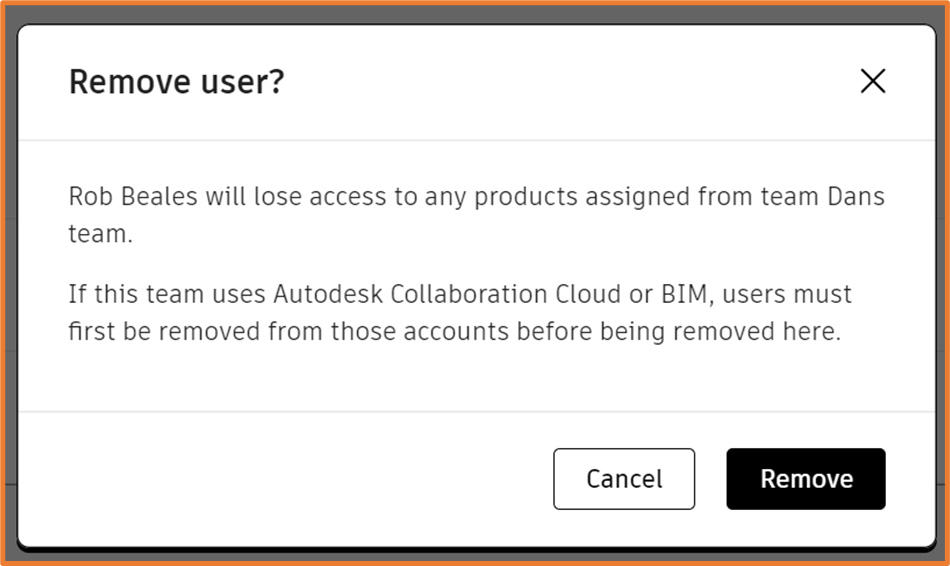
You may have some users that no longer work for the company/need access to Autodesk products. It’s always great practice to clean your estate and remove unwanted users. We can remove users using the bin icon to the right of the users name. Simply hit remove, any assigned licenses will be unassigned and added back to the pool.
License Details
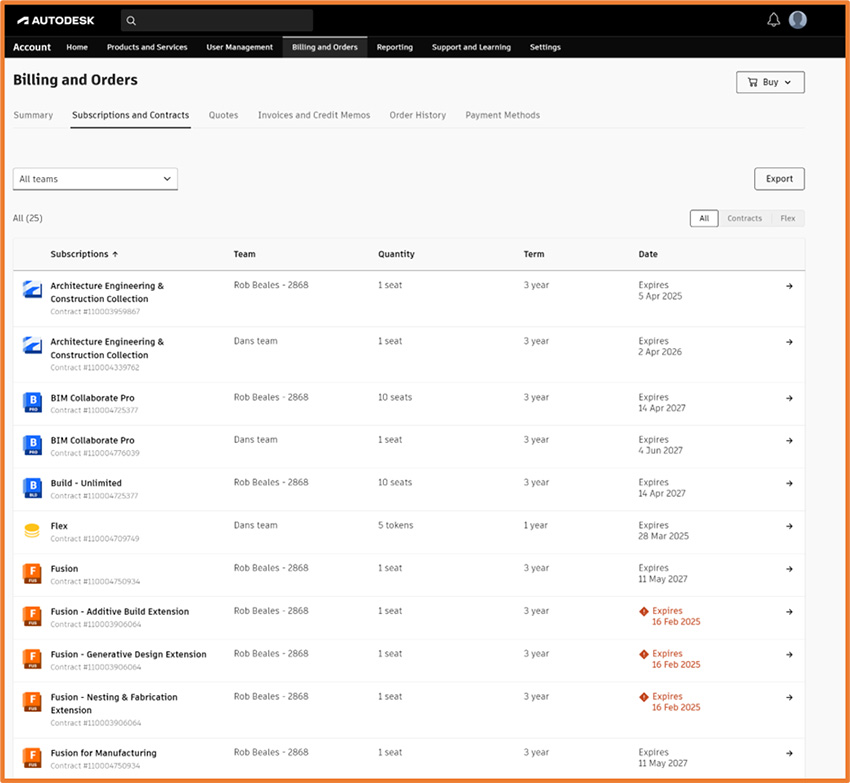
If you need information regarding your licenses, this is available within Billing and Orders. From here, you can find your Subscription/Serial IDs, quantity of seats, expiration dates, quotes/invoices and generate reports.
Installation
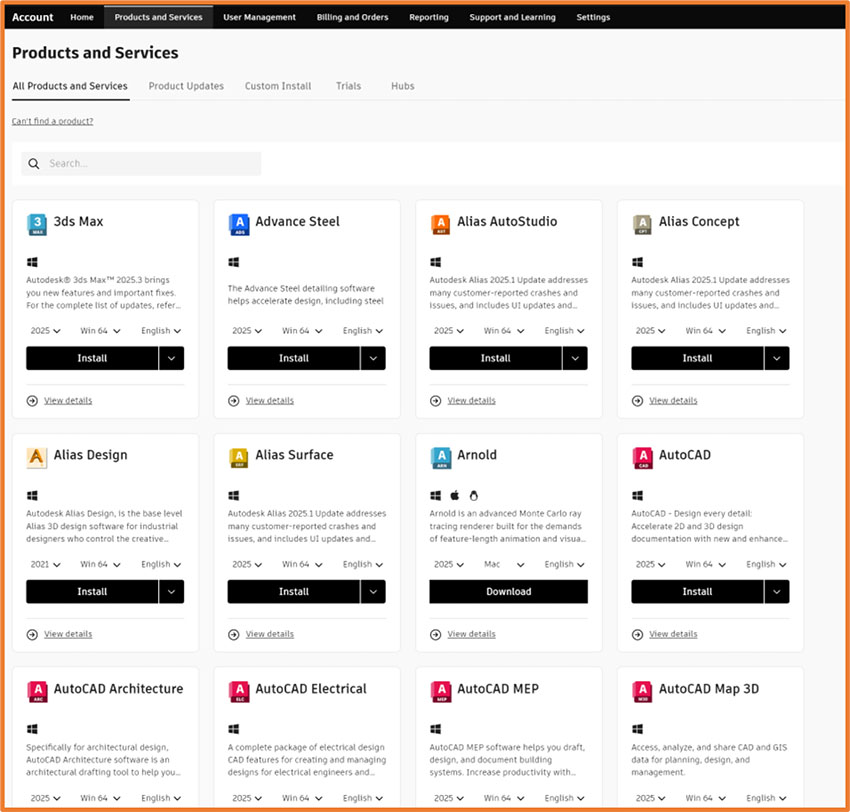
Once users are assigned products, download links will be available under Products and Services. Administrators can download all products, even if they are not assigned.
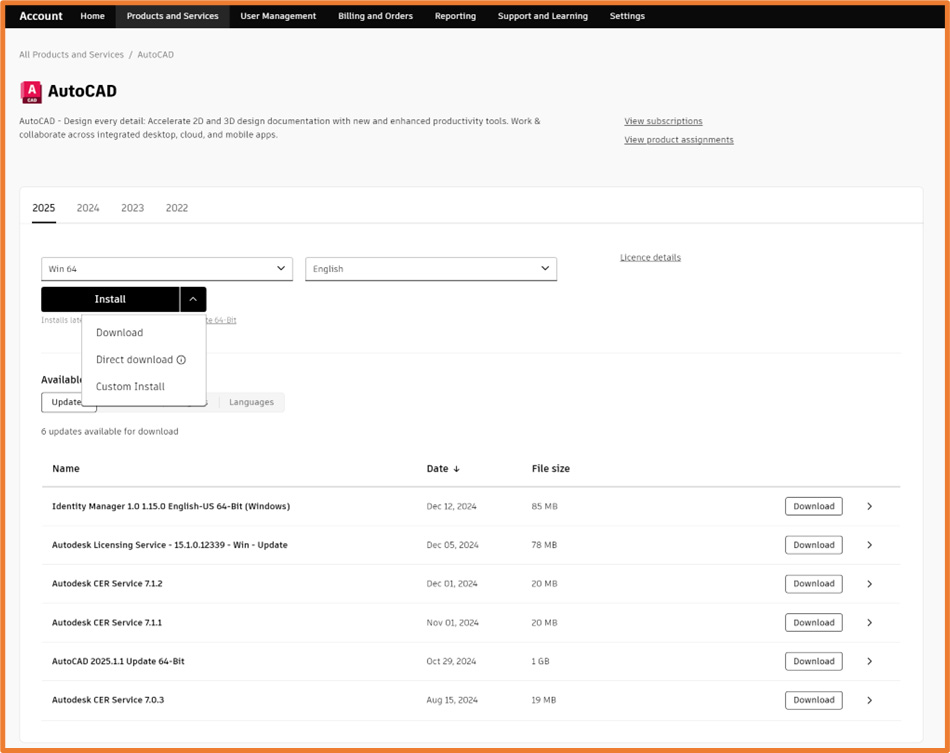
The easiest method is Install, designed for installing Autodesk products on a single computer. This method downloads and installs in one continuous operation, and by default installs the latest product update.
Another method is Direct Download, providing a self-extracting executable file that can be installed offline. Select the dropdown next to Install, then Direct Download.
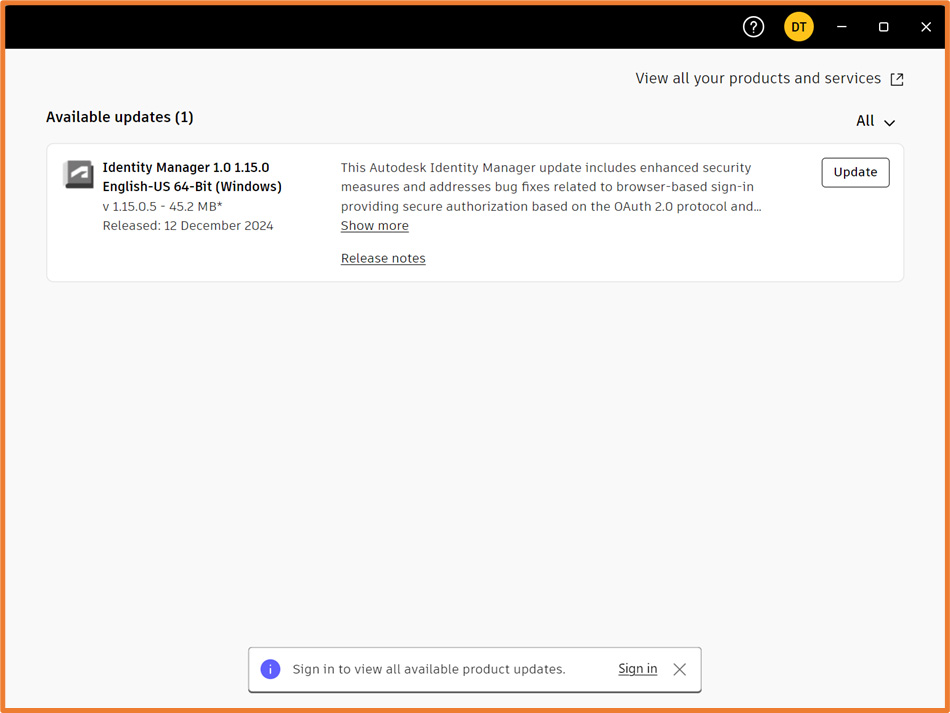
During installation of any Autodesk product, you may notice Autodesk Access is installed. This component runs in the background and allows a simpler method to update products installed. On newer products (2023 onwards), Autodesk Access is also used to sign in and check licenses.
For more information on this blog post, or if you have any other questions/requirements, please complete the below form:


