Autodesk Vault Professional is a powerful tool for managing design data. You can unlock even more potential by using custom objects. Custom objects allow you to tailor your Vault to your specific needs, enhancing your workflows and improving data management. Here’s a guide on how to effectively use custom objects in Vault Professional.
What Are Custom Objects?
Custom objects in Vault Professional are user-defined entities that can represent anything from tasks and issues, to non-CAD documents and more. They provide a flexible way to manage additional data that doesn’t fit into the standard Vault object types like files, items or change orders.
Benefits of Custom Objects
Creating Custom Objects
We will create a task list in the below example to demonstrate how to create custom objects.
- Access the Custom Objects Manager: Navigate to Tools > Administration > Vault Settings. Open the Custom Objects tab and click on the Configure button.
- Create Custom Object: Click on New. Give the task a Display Name and a Plural Display Name.
- Configure the security Access Control list, if only certain people are allowed to use and edit these custom taks.
- Choose a .ico image to denote what the task will be used for.
- Click OK to create the Custom Object.
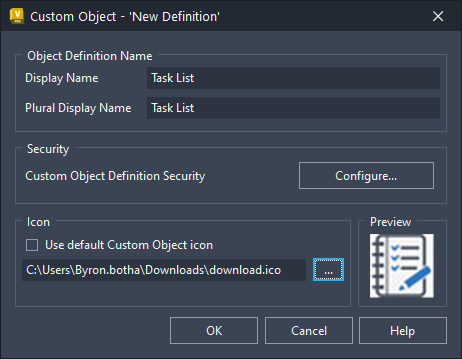
- Set Up a Category for the Task: Create a custom category for your custom object. This allows you to manage the state of the object, as well as determine the properties associated with that custom object.
- Go to Tools > Administration > Vault Settings. Click on the Behaviours tab and open Categories.
- Change the Category Type to Custom Object Categories. Click new then give your category a name, colour and description.
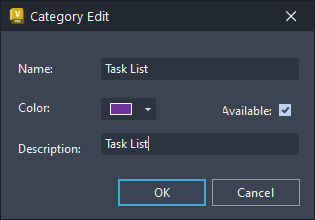
- Define Lifecycle: If your Custom Object requires a lifecycle, you can set one up and assign it to the Category.
- Under the Lifecycles tab, click Edit to open the Lifecycle Definitions Manager.
- Select the Simple Release Process Lifecycle and copy it. This enables you to utilise a predefined lifecycle to establish a new one for your custom object lifecycle.
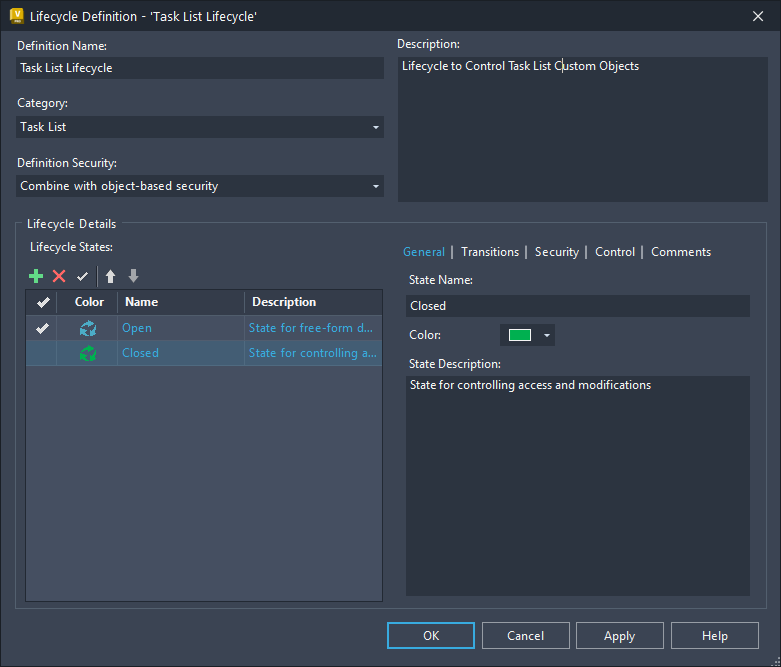
- Give the lifecycle a name, assign it to the Task List Custom Object Category, and define the lifecycle state names, as shown in the image below.
- Assign the Task List Lifecycle to the Task List Category.
- Define Properties: Set up all necessary properties for your custom objects. These properties will hold the data relevant to your custom objects, such as due dates for tasks or priority levels for issues.
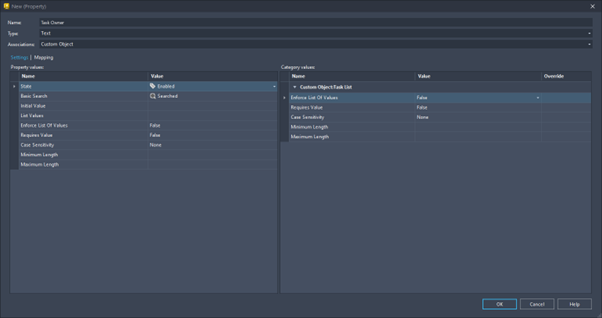
- Click on the Properties tab and click on Edit. For this example, we will create a User Defined property called ‘Task Owner’.
- Click NEW in the Property Definitions Window. Give the property a name, a type and associate it with the custom Task List Category that we have created, as shown in the image below. We will also create a ‘Date Start’ and ‘Date End’ user defined property, that has a Date Type and is associated to the Task list Object.
- Assign more properties to the category; click Assign and add a description to the list of properties associated with the Task list custom object. You should now have Date End, Date Start, Description, and Task owner as properties for the Task list Category.
We have now fully set up our Task List Custom Object.
Using Custom Objects
Once your custom objects are set up, you can start using them in your workflows:
- Create New Task: Select the Task List Custom Object from your File Navigator in Vault. Click New in the top left corner of Vault to create your task. Give your Task a name, in our example, we will create a task to review Mike’s files.
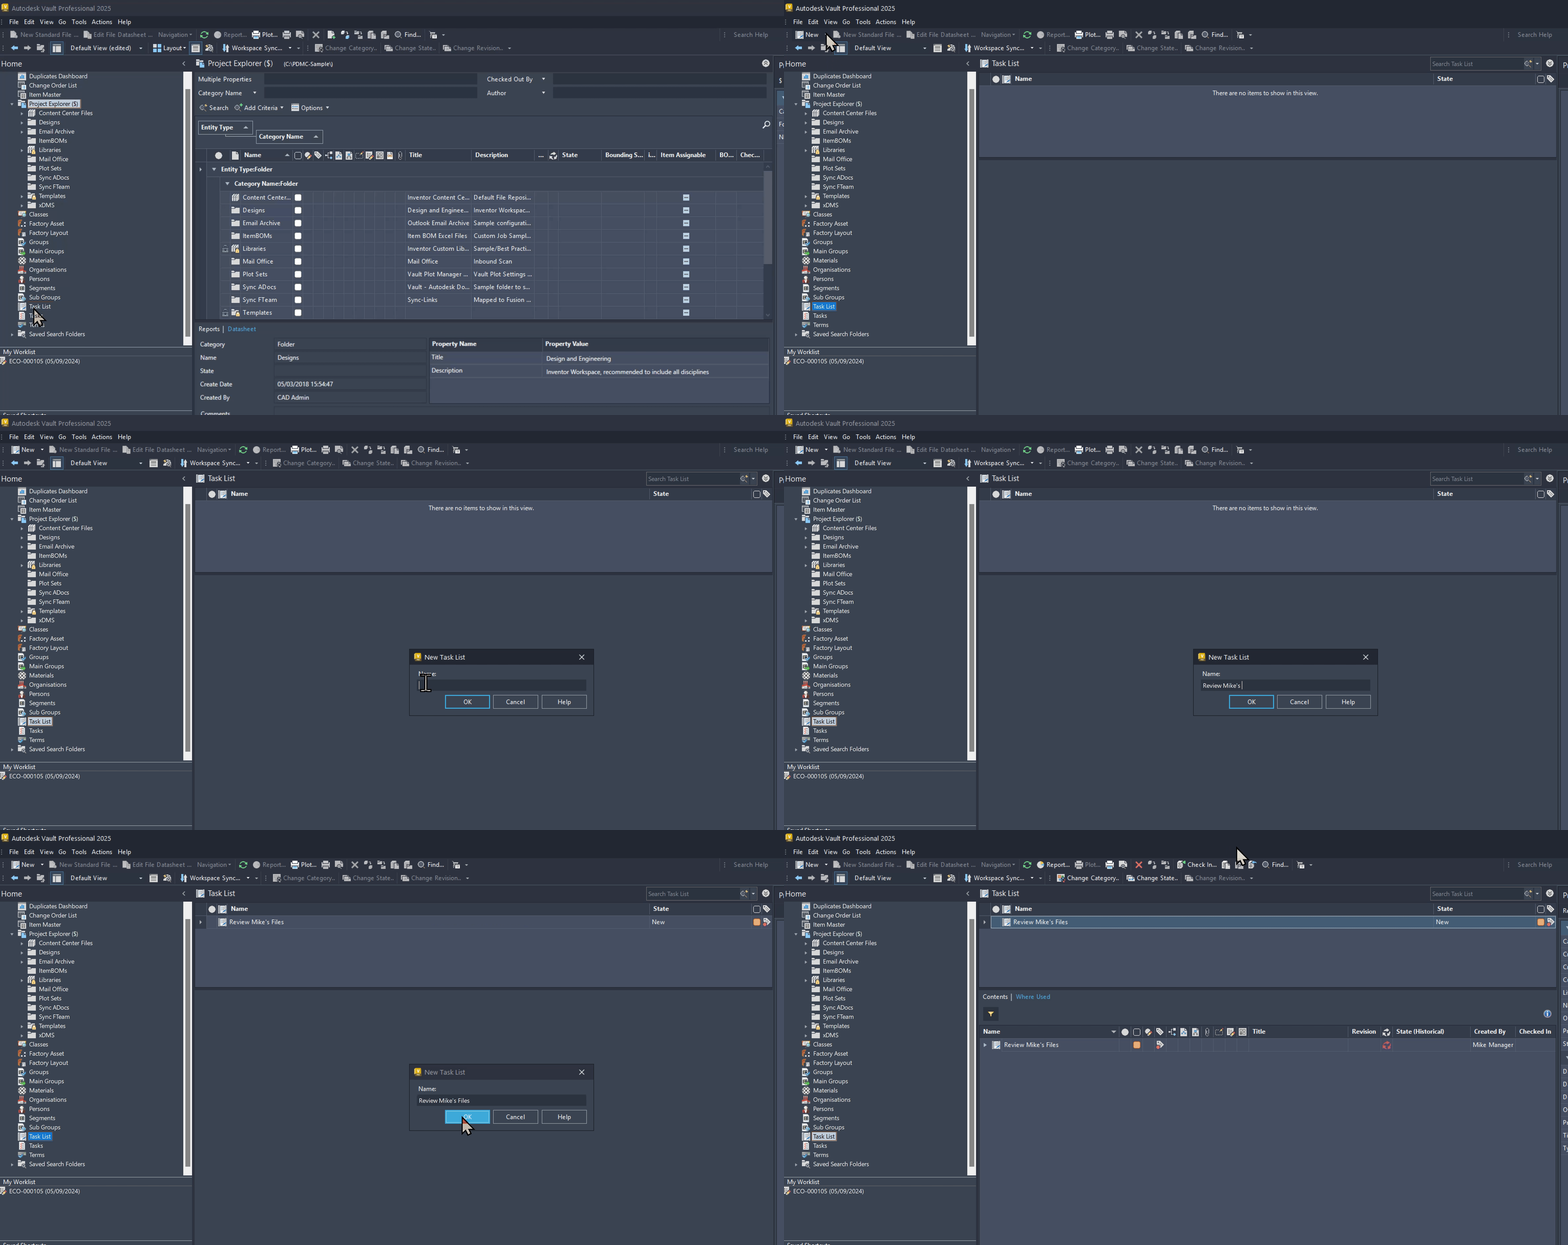
- Fill out the Properties for the File: Add a Start and End date, as well as a descriptions and owner of the task.
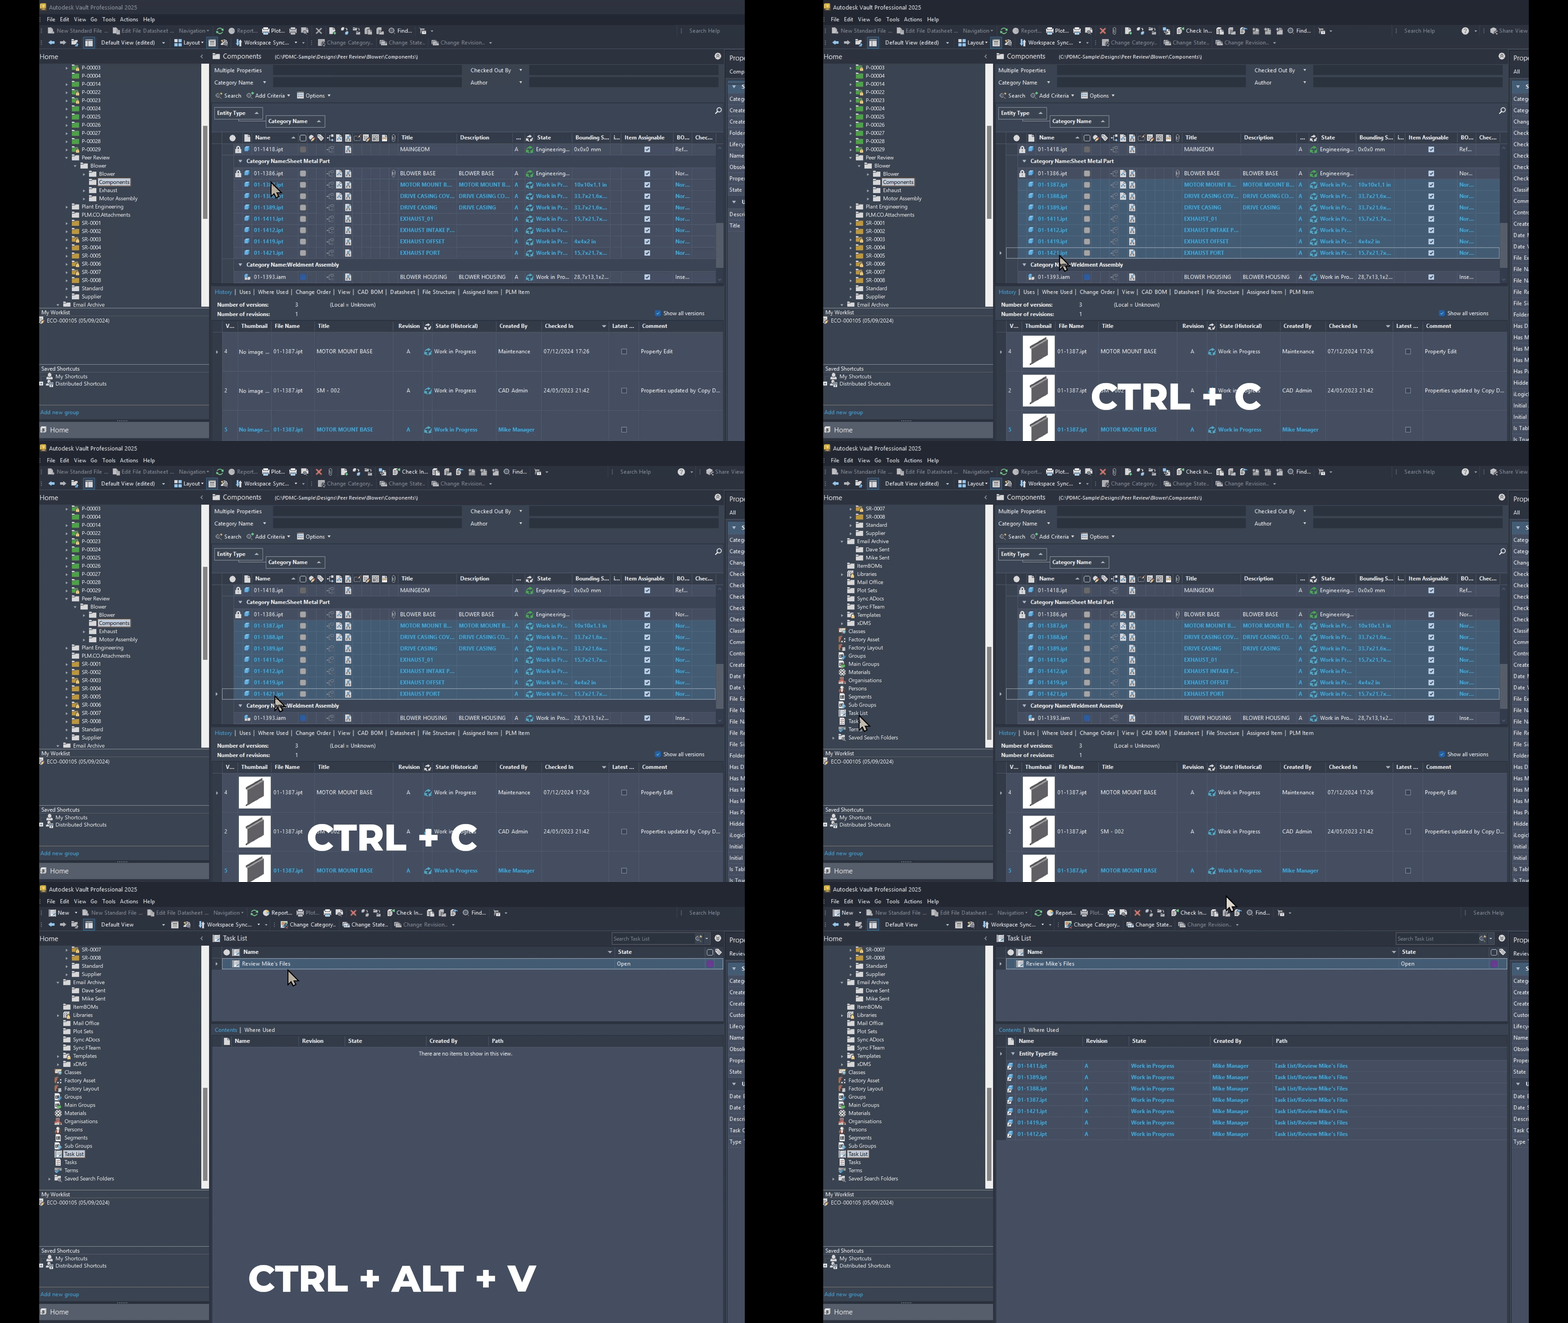
- Linking to Files: Now that we have created the task, we need to link it to the files that are associated with this task. To link files to a task, Copy the files you want to link (CTRL+C), go to the task and select it, then Paste the files into that task (CTRL+ALT+V). When you navigate to this task, you can see all the files that need to be reviewed against this task in the Contents tab.
Conclusion
Custom objects in Autodesk Vault Professional are a powerful feature that can significantly enhance your data management capabilities. By creating and using custom objects, you can tailor Vault to better meet your organisation’s needs, streamline your workflows, and improve overall efficiency.
For more information on this blog post, or if you have any other questions/requirements, please complete the below form:


