
Do you want a wall opening family in Revit which you can then use in a door or window schedule? Using the usual opening tools, although creates an opening, may not give you the desired customisation or flexibility.
This can be solved by using a Revit Family for creating openings. Below I will show you how you can create a very simple opening family, for the purpose of this demonstration we will assume that basic knowledge of families are known.. if you are new to family creation you can find a detailed video demonstration of family creation here.
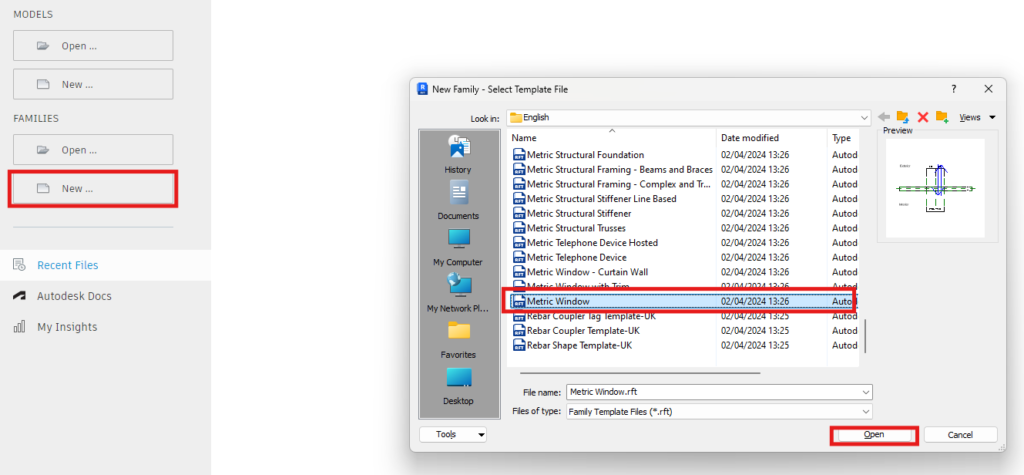
Choosing a template
First of all we need to choose a family template, this will effect where you can use the family. Choosing a wall hosted family will allow you to add the opening to walls, but you could choose a floor hosted template if you wanted to create floor openings.
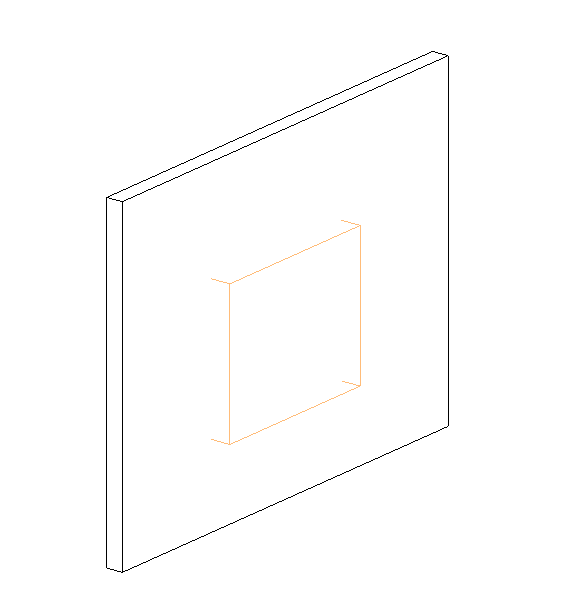
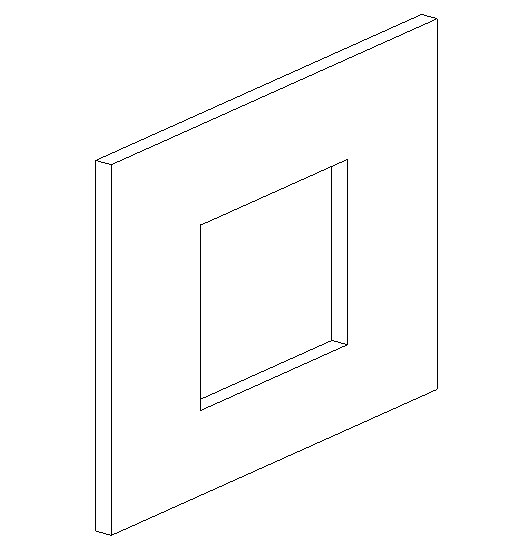
Add a void
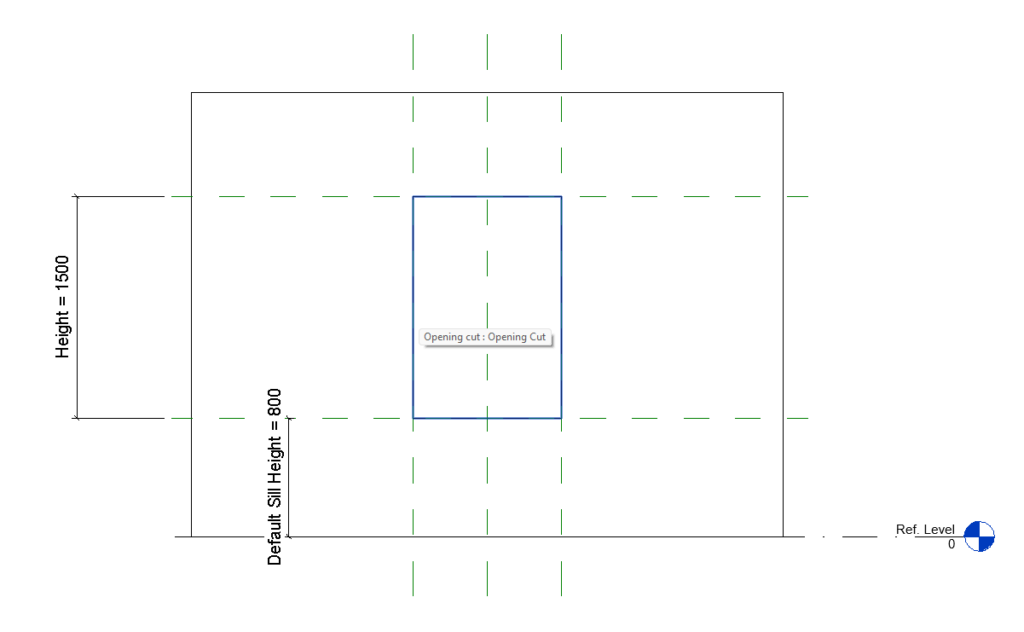
Add a void to the family and constrain it to the reference plane for the wall faces. You can either leave the opening as drawn or add dimensions and parameters to be able to control the size of the opening.
With the void added, lock and constrain the edges of the void into place.
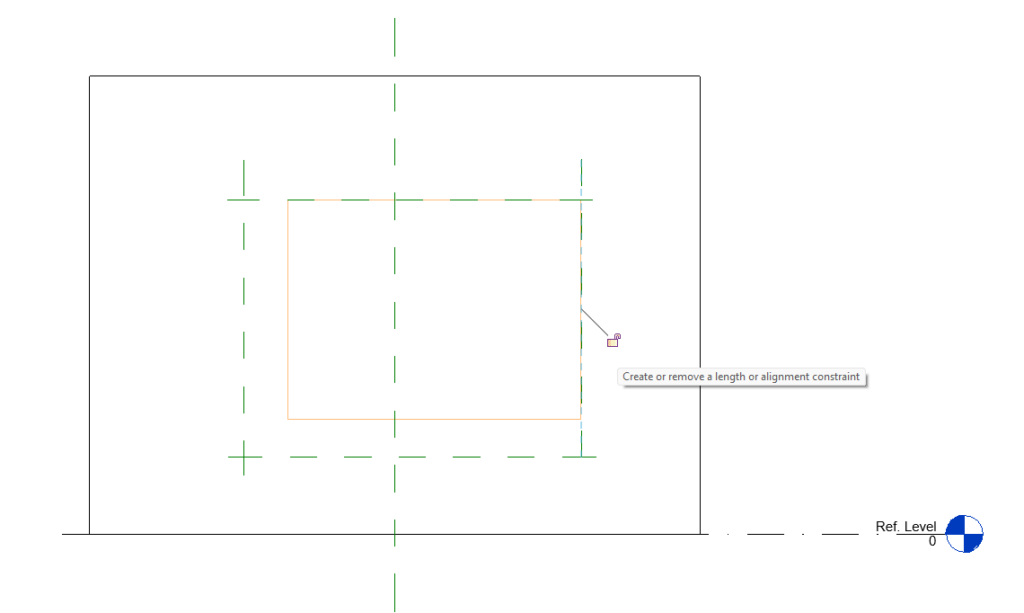
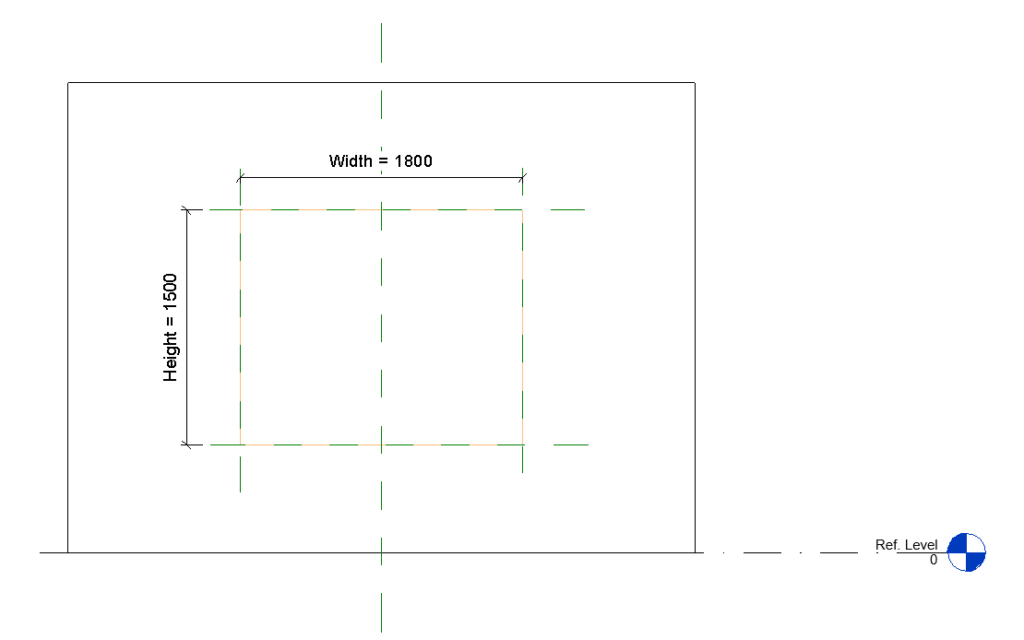
Once constrained use dimensions and assign parameters. Remember to use Instance Parameters if you want to be able to individually customise the openings inside of a project.
Use the cut command to tell Revit to cut the void out of the wall.
If you use a template such as the Window or Door template, a rectangular opening with planes and dimensions will already be set up and you can simply save the family.
You can now save your family and load into a project for use in creating openings.
For more information on this blog post, or if you have any other questions/requirements, please complete the below form:
Related Links
Autodesk Revit – Man and Machine
Autodesk AEC Collection – Man and Machine
Autodesk Revit Training – Man and Machine
Autodesk Revit Demonstrations – Man and Machine
Autodesk Revit – Autodesk Platinum Partner – Man and Machine
Autodesk Revit LT – Autodesk Platinum Partner – Man and Machine
Autodesk Revit LT Suite – AutoCAD & Revit LT – Man and Machine
Revit Architecture Training – Platinum Partner – Man and Machine
Autodesk AEC Collection – Platinum Partners – Man and Machine