
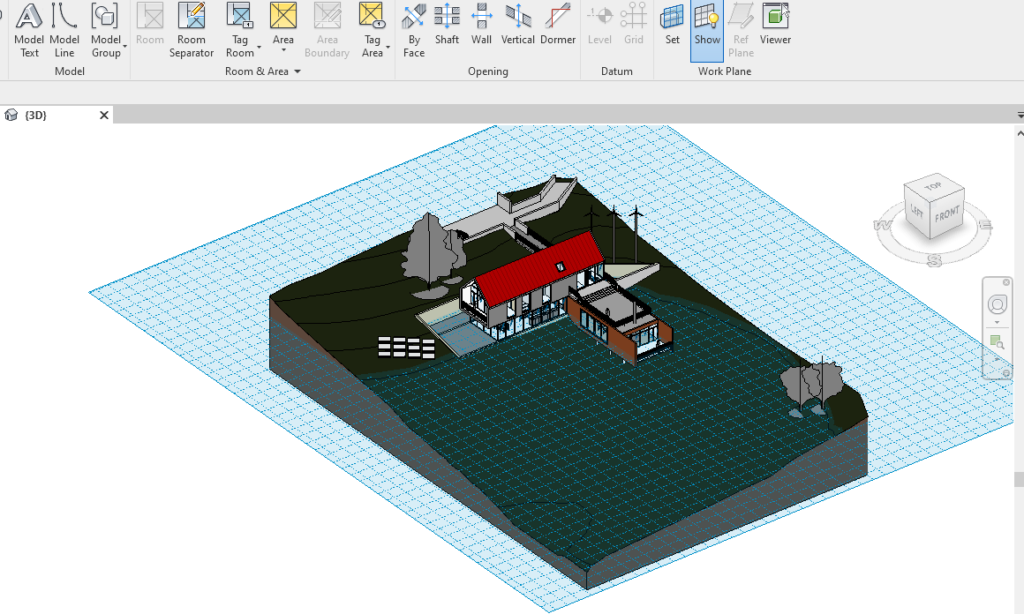
Want to model in a 3D view in Revit? Then your going to need to know how to use the Work Plane.
The work plane is the plane which you are working on, in a 2D plan view your working on the level the view is associated so you don’t need to think about work planes. But when in a 3D view you will need to change between horizontal and vertical work planes and also think about depth and even custom angles.
Here is how to pick a new work plane in 5 simple steps.
1. On the Architecture tab, Work Plane group, click Show to show your current work plane.
2. Click Set to open the Set Work Plane window.

3. Choose Pick a Plane.
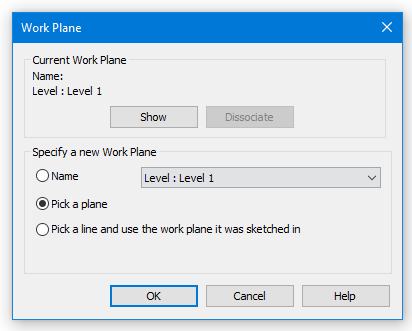
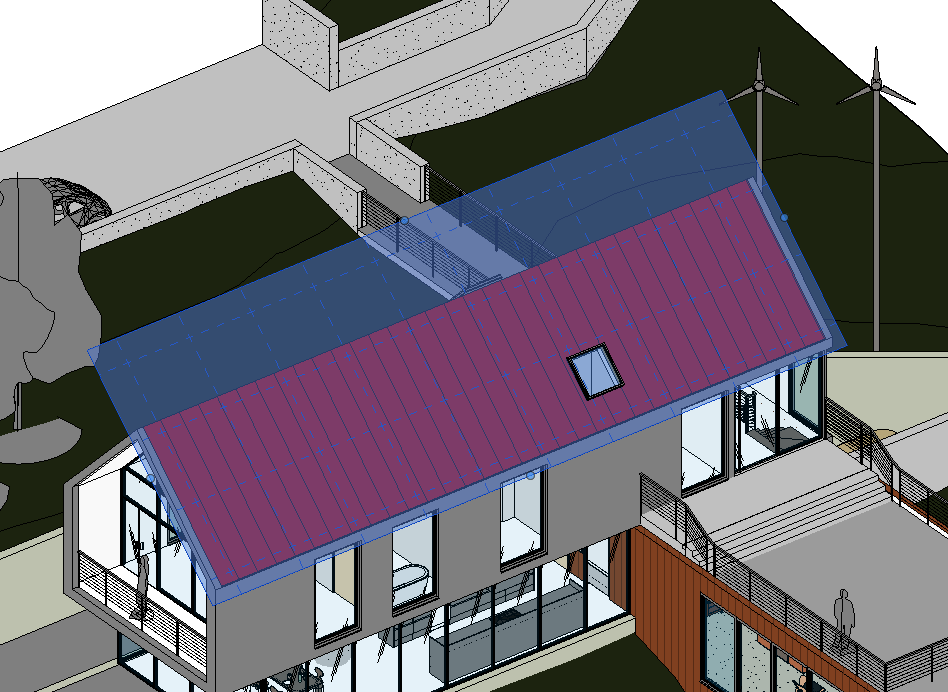
4. Click on an elements face to set it as the new Work Plane.
For more information on this blog post, or if you have any other questions/requirements, please complete the below form:
Related Links
Autodesk Revit – Man and Machine
Autodesk AEC Collection – Man and Machine
Autodesk Revit Training – Man and Machine
Autodesk Revit Demonstrations – Man and Machine
Autodesk Revit – Autodesk Platinum Partner – Man and Machine
Autodesk Revit LT – Autodesk Platinum Partner – Man and Machine
Autodesk Revit LT Suite – AutoCAD & Revit LT – Man and Machine
Revit Architecture Training – Platinum Partner – Man and Machine
Autodesk AEC Collection – Platinum Partners – Man and Machine